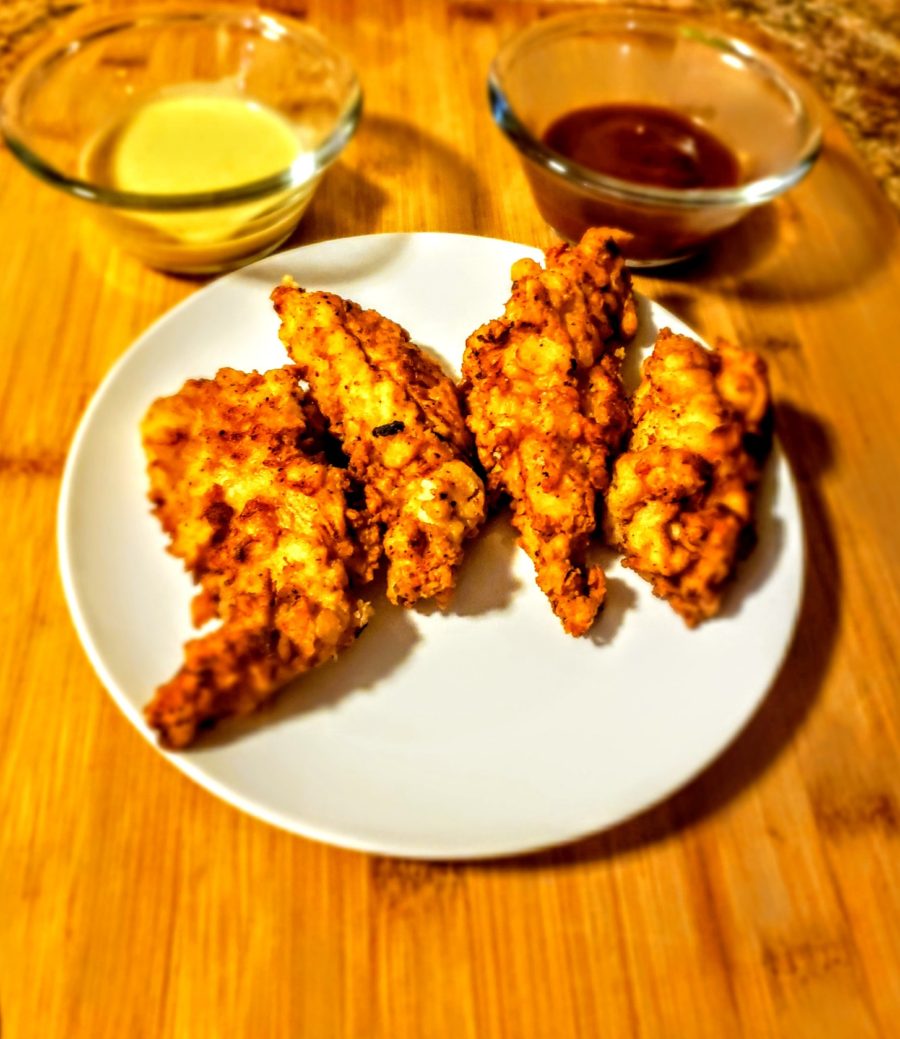
Chicken fingers, chicken strips, chicken tenders… call them what you will but there is one indisputable fact, they are a classic American comfort food. Breaded and juicy, tender and tasty. They can be dipped in just about anything, tossed in buffalo sauce, added to a sandwich or salad, or consumed without accompaniments. User’s choice on that. What a fun little treat! We think our version – buttermilk fried chicken tenders – is the best. Then again, we might be a little biased.
Why Buttermilk?
Buttermilk is the slightly sour, slightly acidic liquid left behind after the churning process of butter. It contains enzymes which further tenderize the meat. It imparts a flavor that creates a love triangle between the chicken and the breading. Lastly, it will help the flour stick. There’s a reason it’s basically religion in the South to incorporate buttermilk in almost all things fried.
Single or Double Batter?
Ahh, another great debate. Do we let the chicken take one dive or two into the sea of flour? We don’t take a hard line approach here. The answer simply is based on preference. Our preference is a single coat because we like the chicken to be the star. We find that in some of the double-dunked varieties the breading takes over the show. You’ll find these only make one trip through our seasoned flour.
With that out of the way, let’s fry!
Buttermilk Fried Chicken Tenders: Preparation
In a large container place enough buttermilk to cover your chicken tenders. Add at least a tablespoon of seasoning to it. We prefer Slap Ya Mama or Everglades Heat for a little kick and a little savory. Marinate overnight if you can but at least 2 hours if there are time constraints.

Once the marination process if complete you will want to season your flour. Please do not skip this all-important step as it will infuse additional flavor into the final product. We drop another tablespoon of Slap Ya Mama into our flour along with a teaspoon of baking powder.

Dredge the chicken tenders one at a time and place on a platter or plate, ensuring they are fully coated on both sides with flour.

Heat oil in a cast iron or other deep welled pan on medium-high heat. Make sure the oil is up to temperature (drop a small pinch of the remaining flour mixture in the pan to see if it bubbles and floats to the top). If you have a thermometer handy you’ll want to keep the temperature at or around 350 degrees Farenheit (no less than 325 degrees). The flour test will work in short order, though. Too low and it won’t float to the top, too hot and the oil will likely pop.
What happens if you fry in low temp oil? A greasy end product as more oil will end up soaking into the battered chicken.
What happens if you fry in oil that is too hot? The outer coating will burn before the chicken can cook. Neither outcome is good but with a consistent burner temp you should be in good shape. This is probably the single most intimidating part of frying for home cooks that haven’t done a lot of frying because it can ruin dinner. No one wants that 😉
Use a set of tongs and drop the tenders into the hot oil. Work in batches if necessary to maintain a single layer and all chicken fully immersed. There should be intense bubbling but if oil is popping out of the pan reduce heat.

Fry until golden brown, 5 minutes or so on each side (use tongs to flip halfway through). Set aside on a paper towel lined plate or cookie sheet as you work through the batches. Serve immediately.
We recommend these two very simple condiments to accompany your latest culinary creation: Honey Mustard and BBQ Sauce. You’ll forget their store bought counterparts ever existed!

Equipment: Buttermilk Fried Chicken Tenders
Disclosure: This post contains affiliate links. Flavor Bible is a participant in the Amazon Services LLC Associates Program, an affiliate advertising program designed to provide a means for us to earn fees by linking to Amazon.com and affiliated sites at no cost to you. Thanks for your support.
To make these Buttermilk Fried Chicken Tenders we used a 12″ cast iron skillet from Lodge. It comes pre-seasoned but we recommend a few additional rounds of seasoning prior to use to really get this skillet ready to rock and roll. If interested you can follow the affiliate link below to learn more about it.

Help Us Grow!
Once you finish basking in the glory of another incredible dish we would love for you to rate and comment below. Tell us how you added your own spin to this recipe. Maybe even give us a share on social media with #flavorbible. You can also follow us on our social pages by clicking the links at the bottom of the page. Check back regularly as we continue on our global culinary journey!

Buttermilk Fried Chicken Tenders
Ingredients
- 2 lbs Chicken Tenders, marinated See Instructions
- 2 cups Buttermilk Or enough to coat all your chicken
- 2 tbsp Slap Ya Mama or other spiced seasoned salt, divided One for marinade and one to season the flour
- 2 cups All-Purpose White Flour Not precise, enough to coat your chicken
- 1 tsp Baking Powder
- 2-3 cups Canola Oil Or other high temperature vegetable oil, enough to submerge the chicken
Instructions
- Marinate the chicken tenders overnight in buttermilk and 1 tbsp of Slap Ya Mama (or other spiced seasoned salt; or a mixture of garlic salt, black pepper, and cayenne to desired ratio). Use a large container that can be sealed.

- Season the flour with the other tbsp of Slap Ya Mama along with the baking powder.

- Dredge the chicken tenders one at a time and place on a platter or plate, ensuring they are fully coated on both sides with flour.

- Heat oil in a cast iron or other deep welled pan on medium-high heat. When the oil is up to temperature (drop a small pinch of the remaining flour mixture in the pan to see if it bubbles and floats to the top), use a set of tongs and drop the tenders into the oil. Work in batches if necessary to maintain a single layer and all chicken fully immersed. There should be intense bubbling but if oil is popping out of the pan reduce heat.

- Fry until golden brown, 5 minutes or so on each side (use tongs to flip halfway through). Set aside on a paper towel lined plate or cookie sheet as you work through the batches. Serve immediately.


4 Comments
Leave your reply.